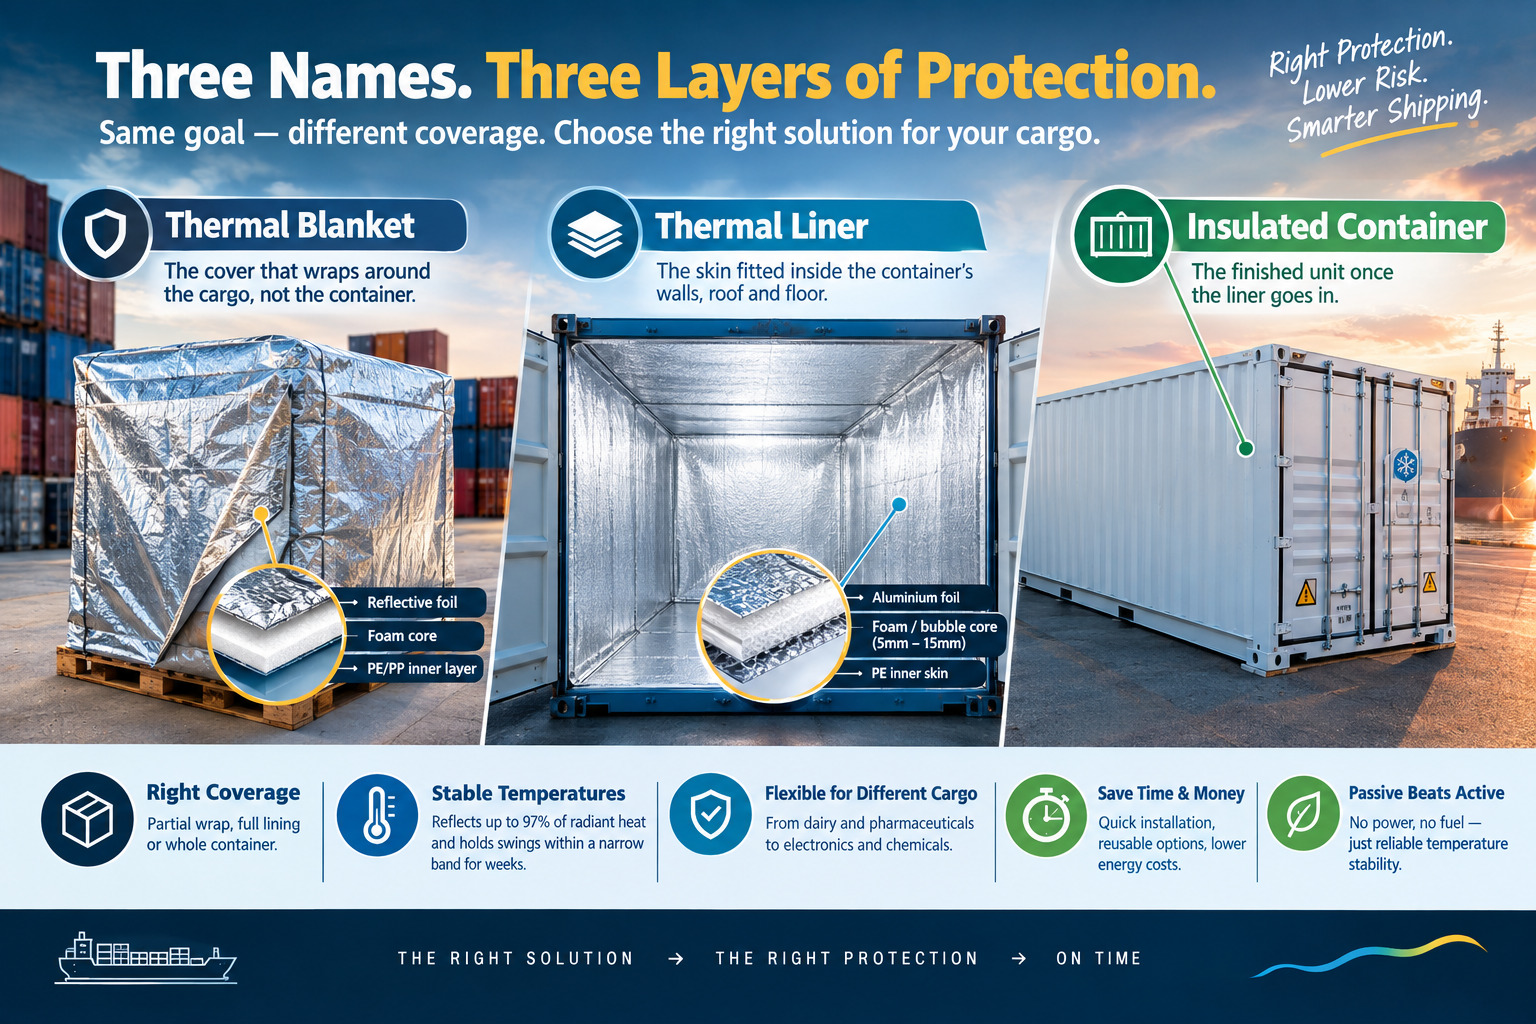

How a Thermal Container Liner Is Installed, Step by Step
A shipping container usually comes in 3 common sizes. You will most often work with a 20ft box, a 40ft box or a 40ft high cube. Each size takes a different length of liner. The fit method stays the same across all three.
There are also many other types of thermal liners on the market. Foam board, spray foam and reflective foil all serve the same goal, and each suits a different cargo type. In this article, we will cover the reflective bubble-foil liner, the type BubblePack supplies for temperature-sensitive freight across Ireland, UK and wider Europe. Picture two layers of foil around a bubble core. Straps and hooks hold it in place, not glue or spray.
Container Checks Before You Fit the Liner
A rushed check causes more liner failures than a faulty product ever does. You should walk the container floor first. Sharp edges, old nails and rust spots all pose a risk, since a sharp point can tear the foil once cargo sits on top of it.
You should also check the walls and roof for damp patches or mould. Moisture behind a liner ruins the insulation value fast. The lashing bars and lugs need a firm check on both side walls too. A loose bar shifts under strap tension. The whole panel then sags away from the wall it should protect.
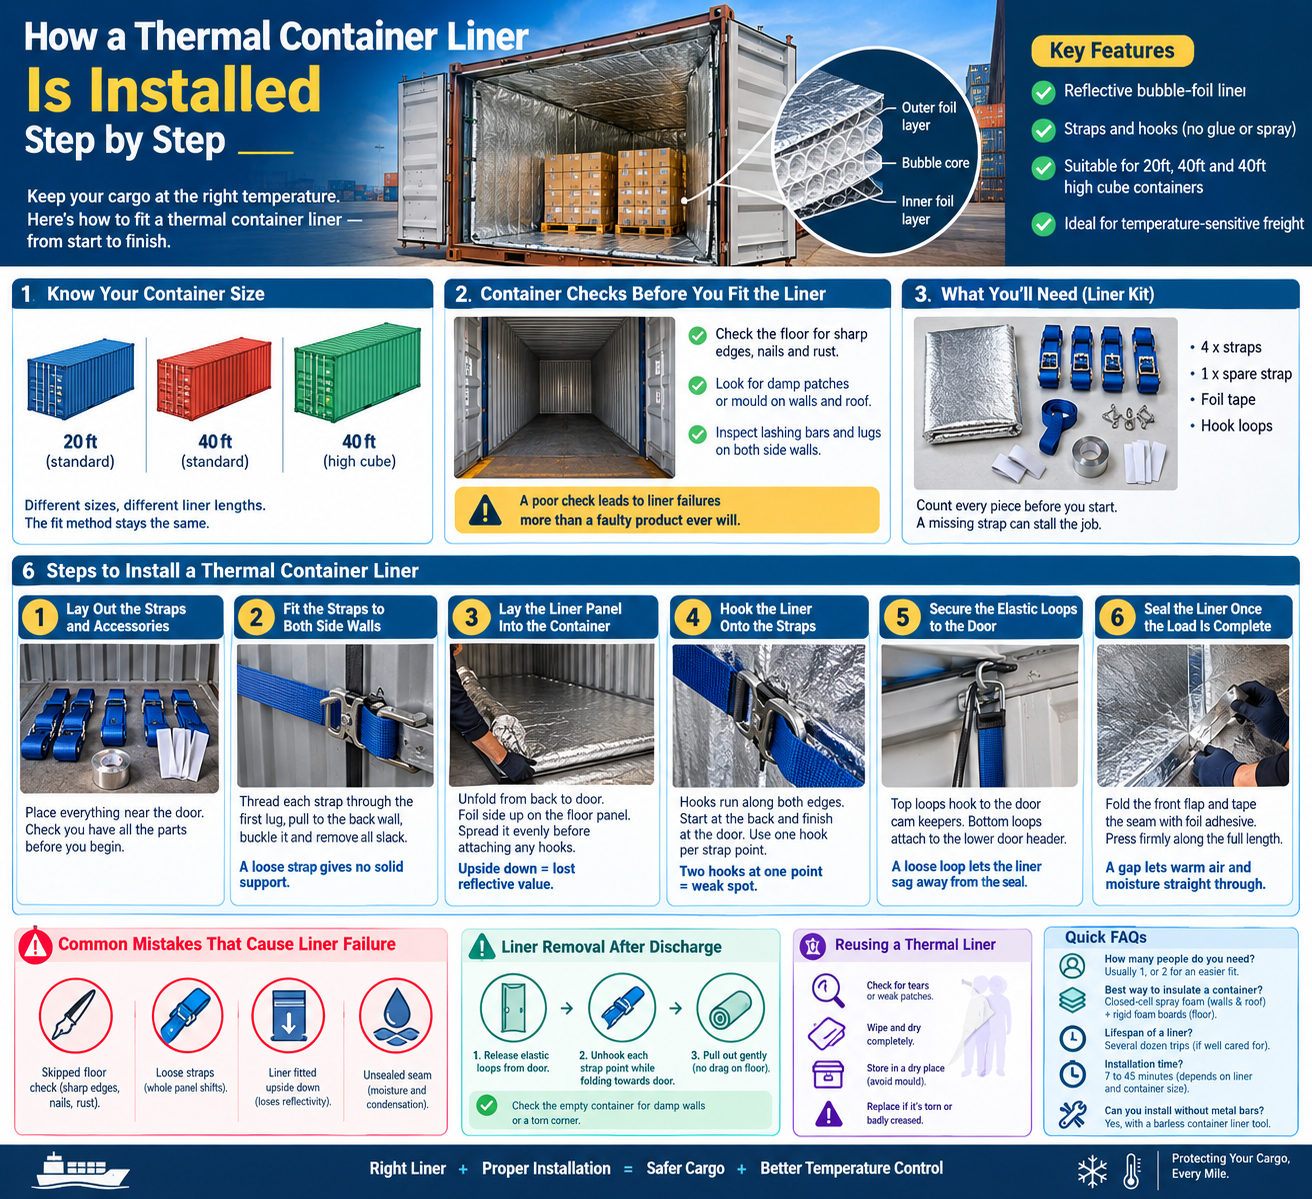
Thermal Liner Installation Step by Step
Six steps take you from an empty container to a fully lined container. You should follow the order below and skip nothing, even on a job you have done a hundred times.
Step 1: Lay Out the Straps and Liner Accessories
You should place every accessory somewhere handy near the door first. A standard kit holds four straps, one spare strap, foil tape and hook loops. Count the pieces before you begin, since a missing strap stalls the job halfway through.
Step 2: Fit the Straps to Both Side Walls
Each strap runs from the top lashing bar to the bottom one. You should thread the strap through the first lug, then pull it to the back wall. You should buckle the loose end and reduce the slack fully. A loose strap gives the liner nothing solid to hang from.
Step 3: Lay the Liner Panel Into the Container
You should unfold the liner from the back of the container towards the door. The foil side needs to face up on the floor panel, since a liner laid upside down loses most of its reflective value. You should spread the panel evenly before you attach a single hook.
Step 4: Hook the Liner Onto the Straps
The liner carries metal hooks along both edges. One hook belongs between each strap point. You should start at the back and finish at the door. Two hooks at the same point create a weak spot instead of a strong one.
Step 5: Secure the Elastic Loops to the Door
Four elastic loops sit at the corners of the liner. Each top loop hooks onto a door cam keeper. The bottom loops attach to the lower door header instead. A loose loop lets the whole liner sag away from the door seal.
Step 6: Seal the Liner Once the Load Is Complete
The final step waits until every pallet sits inside the container. You should fold the front flap closed and tape the seam with foil adhesive. A gap in the seal lets warm air and moisture straight through. Press the tape down firmly along its full length, since a loose edge lifts within days at sea.
Common Mistakes That Cause Liner Failure
Most liner failures trace back to one of four errors. A skipped floor check lets a sharp edge tear the foil weeks into the voyage. Loose straps let the whole panel shift once cargo presses against it. A liner fitted upside down loses its reflective barrier from day one. An unsealed seam lets moisture in, and condensation then builds fast behind the foil.
Liner Removal After Discharge
Removal starts once every pallet leaves the container. You should release the elastic loops from the door first. You should fold the liner towards the door as you unhook each strap point. You should then pull the liner out without a drag across the floor, since a rough patch can catch the foil and tear it.
A quick check of the empty container tells you whether the liner did its job. Damp walls or a torn corner point to a step worth fixing next time round.
Reusing a Thermal Container Liner
A liner in good shape can go back into service. You should check every seam for a tear or a weak patch first. You should wipe the foil down and let it dry fully before you store it, since a liner packed away damp grows mould within a week. Replacement beats a repair once a liner tears or creases badly. A weak thermal liner cannot protect anything on its next trip.
FAQs
How many people do you need for the job?
Usually, one person can easily handle this job, but two people can make a standard fit easily. One manages the straps while the other holds the panel in place. A single fitter can manage a smaller container, though the job takes longer alone.
What is the best way to insulate a shipping container?
Putting closed-cell spray foam on the inside walls and ceiling of a shipping container and rigid foam boards on the floor is the best way to insulate it overall.
What is the lifespan of a thermal insulation container liner?
A well-kept reflective liner lasts through several dozen trips. Careful removal and dry storage stretch that number further. A liner exposed to damp storage or rough handling wears out within a handful of uses instead.
How long does container liner installation take?
Based on the type of liner and the size of the container, putting in a container liner can take anywhere from 7 to 45 minutes.
Can I install a container liner without metal bars?
You can install a container liner without metal bars if you use a certain kind of barless container liner tool.